Thursday, September 27, 2007

Day 43: Stupid Home Depot/Omni Grip

I went to Tile Town to check out tiles for my kitchen floor. I found one that is a pretty good match, but it is not due until next week. I hope that batch is going to be OK since each batch is a bit different.

At $3.19/ft, and with the grout, adhesive, plastic waffle stuff and tile cutter rental, a tile floor should be as expensive as (if not cheaper) than lino since I can do the tile myself. And because I don't (or at least hope I don't) have to level the floor with super incredible precision.

To determine when I can install the tile, I need to work back from my cabinet delivery so I only have to be without a kitchen sink for the least amount of time. So, I asked how long tiles that large (12") would take to set. She said 24 hours which blew my mind. After several days my bathroom tile hadn't set. After many days, I figured it had so applied the grout which cracked when I walked on the floor. Fixing the grout is just another project I need to work on. Turns out pre-mix adhesive is NOT meant for the floor. It just doesn't stand up. So, I should not be surprised if my tiles start popping up! I can't wait. Stupid Home Depot for selling me the wrong product and stupid Omni Grip for advertising itself as a floor tile adhesive. Heck, in the first sentence it mentions floor tile...and not because it is warning users against using it on the floor. The part that worries me most is that I tiled the whole floor BEFORE installing the vanity. That means some tiles are half under the cabinet so if I have to retile, it will be hard to deal with those tiles. Aside from one tile in front of the toilet that cracked (probably when toilet was put back on), the floor has held up very well. Cross your fingers and tread lightly when you go into my bathroom! I've included a picture so you know what product NOT to buy.


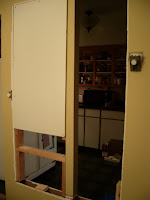
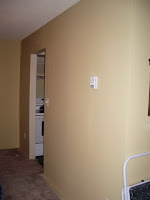
In other reno news, I put a coat of paint on the dining room wall (the one that had the big openings in them) and it looks FANTASTIC! As long as you don't move your hand over the entire wall, you won't be able to tell that there are some highspots where the old drywall met the new drywall. Now to find something to hang on that wall. Maybe I'll see if the Portuguese artist from Bastion Square is still doing paintings.
Tuesday, September 25, 2007

Day 38: I Have Smooth AND Painted Walls!

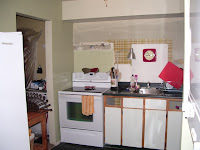
Yippee…my kitchen walls are finally smooth AND painted. I completed my touchups and applied the drywall sealer to all the walls, the bulkhead and the ceiling. It was tinted the colour of my bathroom walls, so it gave me an idea how the finished product would look. The angle I put in the bulkhead was a beautiful work of art! And the ceiling came out so nicely. Once a uniform colour, I was able to see a few spots that needed more mud. These were few and far between, so I’ve been carefully applying mud so I don’t have to re-sand.

While the appliances were still in awkward places like the middle of my front hall and kitchen, I went to pick up a quart of green paint (Restoration Hardware’s “Willow”, discontinued) that I thought would add more colour to the room. It was enough to put one coat on nearly all the walls. I’ve put the appliances back and am living with the colour. It is a pistachio green that I am not sure I love but it does go well with red…the colour I plan to use as an accent colour.


I am also living with some of my stuff back in the kitchen. I put up a temporary shelf and have food and dishes lining the countertop. It isn’t a finished kitchen, but it is clean, colourful, and way more functional than it has been the last few weeks. It is a good thing I can appreciate the small accomplishments because the finished product is months away.

Now that my walls are so smooth and colourful, I am reluctant to cover them up with the bead board paneling I have in mind! The room definitely needs trim around the doors, and I really do think the paneling will look great. Fortunately, I can’t do anything about the bead board until after the cabinets are in so I don’t have to decide now.

Saturday, September 22, 2007

Day 37: This Better Be My Last Sanding!

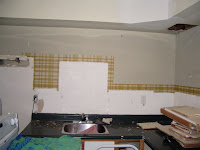
In just under a week Harbour City Kitchens will be here to measure for my kitchen cabinets. In order for them to be able to take accurate measurements, my walls need to be painted. That meant finishing up the angle in the bulkhead and sanding all afternoon. I also decided to take down my upper so now I get to look at the original and very ugly wallpaper.


The bottom half of my walls were pretty rough since I was planning to put up my beadboard paneling. In case I don’t, I wanted to make sure my walls were smooth all over so another 10 kg’s of mud went up. After a good rigourous sanding the walls look pretty good and the bulkhead just needed a few touchups with mud! A quick sanding later tonight or early tomorrow and I should be able to clean up and prepare for paint. I think that feat in math and carpentry that was the bulkhead angle might be my greatest achievement. It is off by 1/16th - 1/8th of an inch, so I hope they can install that corner cabinet that much away from the long side so it is centered on the angle. If not, it will still look better than no angle at all.

Once the paint is up, I can put my appliances back and start using them again. That means plugging in the stove and stocking up my fridge. The fridge was plugged in this whole time, but I wasn’t stocking it that well. Needless to say, for the last few days I have been eating noodle box or cereal until I ran out of milk. Then it was on to instant oatmeal which I prepared with hot tap water as I couldn’t be bothered to plug in my microwave to boil the water. And Evin gets to eat crunchy food for dinner because the wet food is too much of a hassle to deal with.

I got the coolest gadget for sanding. Actually, it is for the plastic sheeting that goes up while sanding. It is a self adhesive zipper that is intended for tarps. Now I don’t have to crawl in and out of a corner to get out of the kitchen! I didn’t find the zipper at the paint store, but rather at Industrial Plastics and Paint. But I bet Capital Iron would have them in the camping/tarp section.

Sunday, September 16, 2007

Day 31: More Drywall...is that possible?

To accommodate the angled corner cabinet (upper), I wanted to angle the drywall bulkhead that runs the length of my upper cabinets and sticks out about 3 inches past the front of the cupboards. After lots of math and graph paper, I figured out the angles. It didn’t take long to attach the framing to the bulkhead and before long it was covered in drywall and mudded. I used paper tape for the edges though the plastic self adhesive mesh tape is easier to work with.


My new plan is to have the kitchen painted by Sept 28th which is when the cabinet guy comes to measure. That is no less realistic than any other plan I’ve had so far, but it is a target that isn’t carved in stone. Technically I can wait until late November to finish the walls, but I am tired of the dust so want to finish up sooner rather than later. I am pretty hopeful I will have the angle mudded by next weekend so I can spend Saturday morning sanding. Cross your fingers there are no bubbles in the drywall mud. Grr.

Wednesday, September 12, 2007

Day 27: Blowing the Budget

Within a few hours of making the decision to go with the fake wood cabinets I began to have doubts. The cabinet doors would be quite modern, no matter what accessories I brought in, and I know I would have regrets about not going with the style I initially had in mind.

So I called HCK back and got an estimate for the Landcaster door in white. Not only is the door style my top pic, but it is light and will make my kitchen seem brighter and more open. The upgrade will be about $1000. I've chosen to look at it like this -- got the cabinets I wanted at an affordable price and splurged on installation fees!

The guy comes to measure in a few weeks (on my first flex day) so I will know shortly thereafter exactly what the price will be.

While bouncing ideas off people, the idea of a glass mosaic tile backsplash in a nice watery colour was brought up. It would be beautiful, and I only have 34 square feet to tile, but at $18/square foot, that is a buttload of money. And then I would have to do something really high end on the floor, so I think I will stick with either a basic tile (with neat accent tiles) or beadboard which I might paint the wall colour so it doesn't look so bland.

I've purchased new knobs, but they are a little common, even if they do match my bathroom knobs. I think I will go with a black version of that knob and a matching (black) large pull like you see on old desks.

Well, gotta run.

Saturday, September 8, 2007

Day 23: Cabinets are on order!

What a week. I stopped into Kitchen Craft (Cloverdale) one day this week as it is within walking distance of work. We went over my measurements and she walked me to a kitchen about the same size as mine and said this one is $12,000...so yours (with no real wood cabinets) would be $9000! Yikes, that is so far off my budget ($5000) and it is pretty hard to shave off $4000 so I should have told her to forget about preparing a quote.

Feeling thoroughly discouraged (even though I knew Harbour City Kitchens would be less), I went to Home Depot to get some quotes. The Mills Pride cabinets came is strange sizes and there was really no way to make it work. They obviously don't have their target audience figured out as they had no matching bridge cabinets for over the sink (we aren't all that lucky to have a window over the sink) nor a similar piece for over an apartment sized stove (I have a full size stove, but most people buying those cabinets are probably trying to finish off a suite). So I talked to Dale in the design center. Right off the bat, two suppliers were taken off the list due to unreliability. I was left with Kitchen Craft and Thomasville. The door I chose started at $219/linear foot, so a 10x10 kitchen (slightly bigger than mine) would start at $4000+. Not bad. But when you add drawers and upgrade the drawer slides, it was going to come to between $5000 and $6000. Still pretty pricey given counter tops and installation wasn't included.

Today I was finally able to get out to Harbour City Kitchens on a day they were open (they close at 5 most days and were closed last holiday weekend). Alas, there was nothing in Cash and Carry, and no done up kitchens just waiting to be sold for a good price. I found out that cash and carry units are the same price as ordering but you pay both taxes. If you order and have them install, then you only pay the GST. I thought maybe there would be an advantage to getting at least the cash and carry sizes (thinking they were cheaper) so tried to use as many of those in my design. Next came choosing a door style. The cheapest was plain white LP laminate (which look like the storage units you can buy at Zellers. Next was a PVC coated door with the fancy "raised panel" on the inside...you've seen them -- "white melamine" cabinets that were big 14 years ago. Next in line was a LP laminate with curved/rounded vertical edges. They come in lots of colours. The shaker LP Laminate I was thinking of looked OK when done up but was susceptible to moisture since there are seams where water can get in. And I was getting tired of the idea of painting all those doors. After much thought, I decided to go with a Millwork Cherry rolled edge styled door. Kind of modern, but the same colour as my bathroom (which are maple, not cherry as I had thought). With slightly more traditional drawer pulls and the rest of my stuff, it won't look uber modern. Plus the wood will tie in with all the wood I have in my living room. I'm a bit nervous as I can't exactly picture it in my mind, and it means I may not be able to do a beadboard back splash, but that goes in at the end so I can see how it looks when all done. I've also got to ensure my walls are super smooth since I may not be able to finish with beadboard. So much for all that craftsmanship I was trying to go for.

They come to do a final measurement on Friday the 28th (my first flex day) and will probably be ready to install late November. Such a long time away, but plenty of time to get my walls ready and flooring selected. I've pretty much decided to go with lino, especially now that my cupboards are "wood".

The moment you were waiting for...$4000+ for cabinets, countertops (same as bathroom but not as pink as pic shows it to be), INSTALLED Professionally! Beat that Kitchen Craft! It was going to be cheaper, but I decided to get as many drawers as possible and a microwave shelf.

Gotta run, I hear the Brick guys outside getting my dishwasher off the truck. I think I bought it a little too early!

Saturday, September 1, 2007

Day 16: Procrastination and Cats

I had grand intentions of sanding today, but I am not looking forward to it, so am slowly inching my way through the prep.

I'm a bit worried about the "bulge" on the diningroom wall. The previous owners didn't do a great job and I'm afraid my concealing efforts will not be enough to mask the ever growing bulge. My options: break open the bulge and fill with mud or new drywall on that entire wall. Either way, my kitchen can proceed.

So far, I've gone to three separate cabinet places...all of which were closed. I would have expected to see signs saying closed for entire weekend but no such luck. I was a bit annoyed as I made my way home and decided to take a nap. Once home though, I started sealing up the kitchen for the sanding.

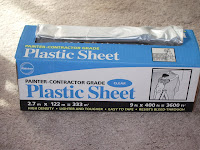
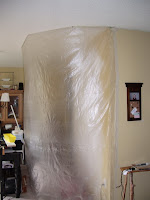
I bought an industrial size box of plastic sheeting and began covering up doorways, blocking off a section of the dining room, and covering pieces of furniture I would prefer not to dust should my first layer of sheeting not work for some strange reason...hmmm...Evin....


As you can imagine, Evin was enthralled. He's pierced a few holes in some of the plastic (hence dual coverage), and got completely entangled in a wad of plastic I was about to mount from the ceiling.


I still feel that nap coming on, but I still need to cover all the appliances. Sigh...what a lot of work.